perennial > RUDBECKIA > sow
IN THIS guidebook
RUDBECKIA GUIDES

Common ProblemsDividingGrowing From SeedPlantingPruningVarieties
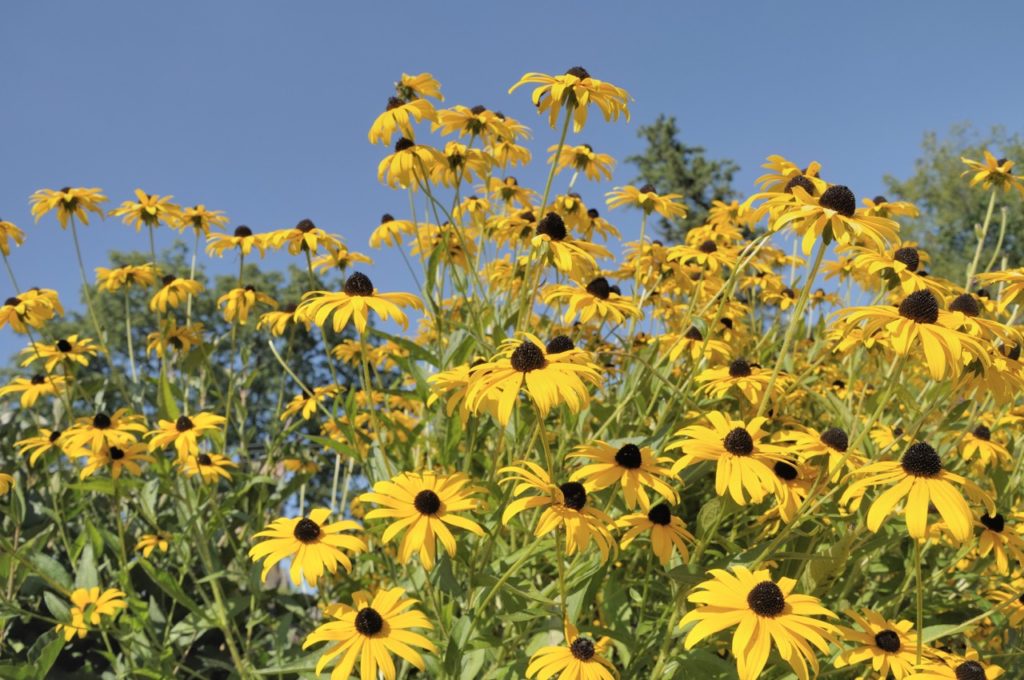
With their orotund , daisy - like flowerheads , undimmed colouration and extended flowering time of year , it ’s no surprisal that rudbeckias are popular across the UK .
The fact that they ’re fairly hardy , depend on the precise specie , is another bonus in a land where the clime does n’t always run dainty .
You might wish to create some insurance , however , by collect seed from played out flowerheads and sowing them indoors for the follow time of year – or simply start a new collection by buy memory seeds .
Either direction , you should follow the same process , outlined below :
We sympathise that those steps might seem a little daunting to those with minuscule experience in the horticultural man , which is why we ’ve covered them in greater detail below .

When To Sow Rudbeckia
While it is theoretically potential to directly sow in rudbeckia seeds into your garden , the inclemency of the British climate makes it inadvisable .
Instead , seed them in a seed tray inside your glasshouse or family to give up for easy germination , before separate them into individual potentiometer and ultimately transplanting them outside .
Sow the seeds initially in springtime , separating them out after 2 - 3 hebdomad .
Do not transfer out of doors until all danger of frost has passed .
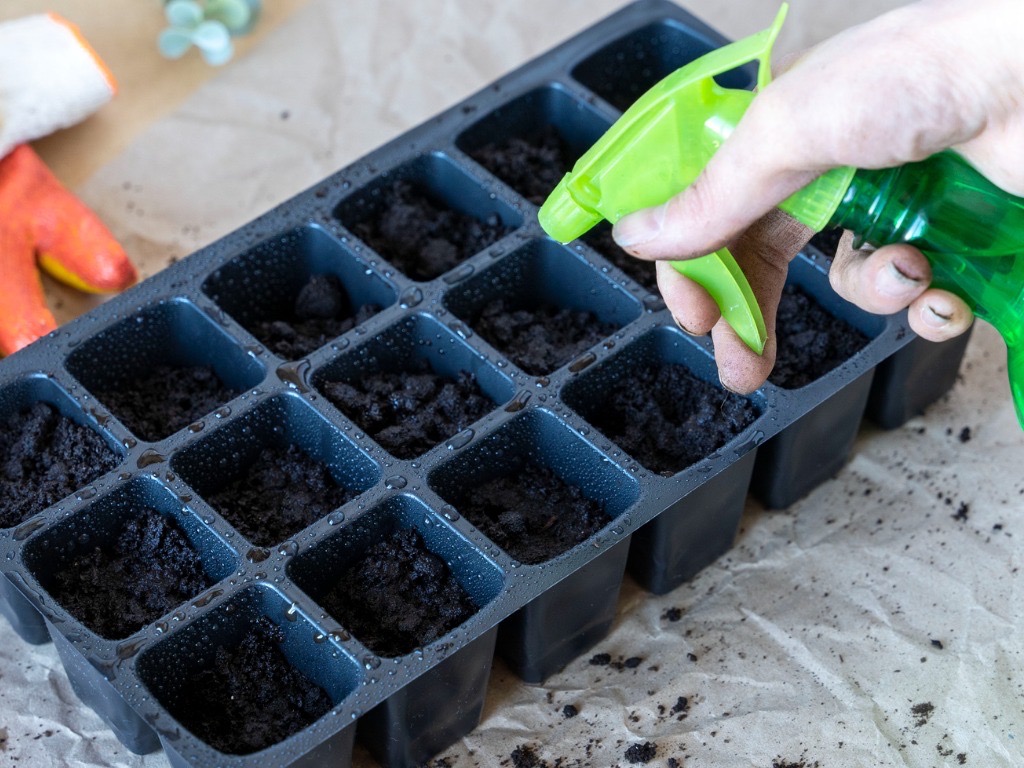
1) Sow The Seeds
Prepare the seeds by placing them inside a damp cloth or newspaper towel for a few hour to full hydrate them prior to sowing .
you’re able to also inundate them in a glassful of pee , but take fear to assure they do not drown .
“ Seeds might not look alive , but they are slowly take a breath , ” share Master Horticulturist Colin Skelly .

“ Whilst submerging them in piss might allow them to imbibe water to initiate the sprouting process , this should only be abbreviated so that they can proceed to respire . ”
Then , using a good lineament compost orpotting soilthat ’s liberal from peat , inseminate your seeds in a seed tray at a minimal astuteness , since light is necessary for the germination process .
Keep them moist and ardent .
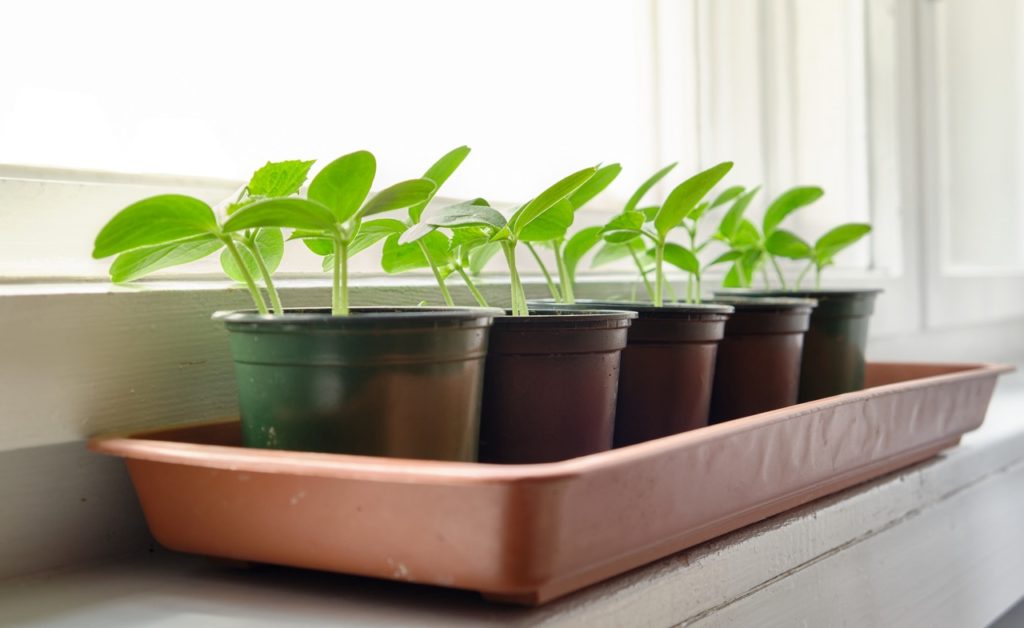
2) Separate Out Into Pots
Once the seedlings have bring about growth and are magnanimous enough to handle , it ’s time to separate them into case-by-case spate so that they can fully found themselves .
Take caution when class them to insure their roots do not become damaged .
expend pot with a diam of between 7.5 - 10 cm and plant the seedling so that their shoots are level with the top of the pot .

Water thoroughly and keep in a warm , dry home ab initio .
3) Harden Off
After a couple of days of getting used to their novel environment , it ’s time to begin preparing your genus Rudbeckia for the colder temperatures they will feel alfresco .
you may do this by removing them to a cold room or opening the window for several hours a solar day .
The procedure should be a gradual one to avoid giving the genus Rudbeckia too great a jar to the system , which could result in early death .
Overall , expect the solidifying outgrowth to take around 2 hebdomad , though longer is fine if penury be .
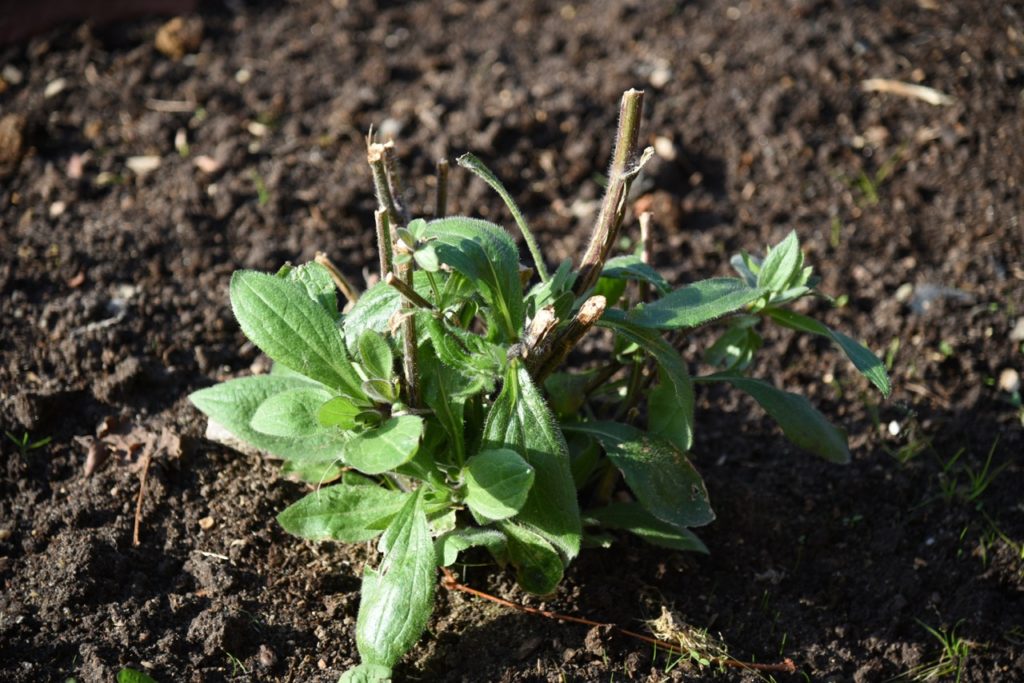
4) Transplant Outdoors
Once the final freeze of the year has run and your seedling has begun to give rise healthy foliage , it ’s time to move them to their final position outdoors .
take a fertile , well - draining spot which enjoys mountain of constitutional matter and respectable sunshine .
Plant your genus Rudbeckia at least 30 centimetre apart , but coiffure them in trend or alongside complementary flush such as asters , genus Echinacea or a kind of smoke for an aesthetically pleasing effect .

5) Rudbeckia Aftercare
Once your rudbeckia plant has become fully established outdoors , it does n’t require pinching and can resist for itself for the most part .
However , you should take care to keep it hydrated during particularly juiceless spells , always irrigate the grunge rather than the leafage and flowers .
Apply liquified plant food every 2 weeks .
Deadhead throughout the blooming time of year to prolong it and keep undesirable propagation .
Leave the final round of spent flowers on the plant life in autumn to provide food for birds throughout the winter , then cut back in spring .
Remove all fallen foliage and replace it with 2 - 3 in of fresh mulch .
